
TL;DR
To start a DIY kitchen backsplash, map a level first course, dry-fit to avoid slivers, use edge trim for clean ends, and set tiles with the right notch trowel; grout and caulk the next day. Upload a photo of your kitchen to ReimagineHome.ai to preview tile size, pattern, grout color, and terminations before you buy — a low-risk way to plan a DIY kitchen backsplash on a budget. If overhead lighting is scarce, test wafer-light spacing and under-cabinet LEDs in a virtual mockup to avoid over-bright, conference-room vibes. Try your own photo in ReimagineHome.ai.
Why Small Projects Feel Big When Pros Say No
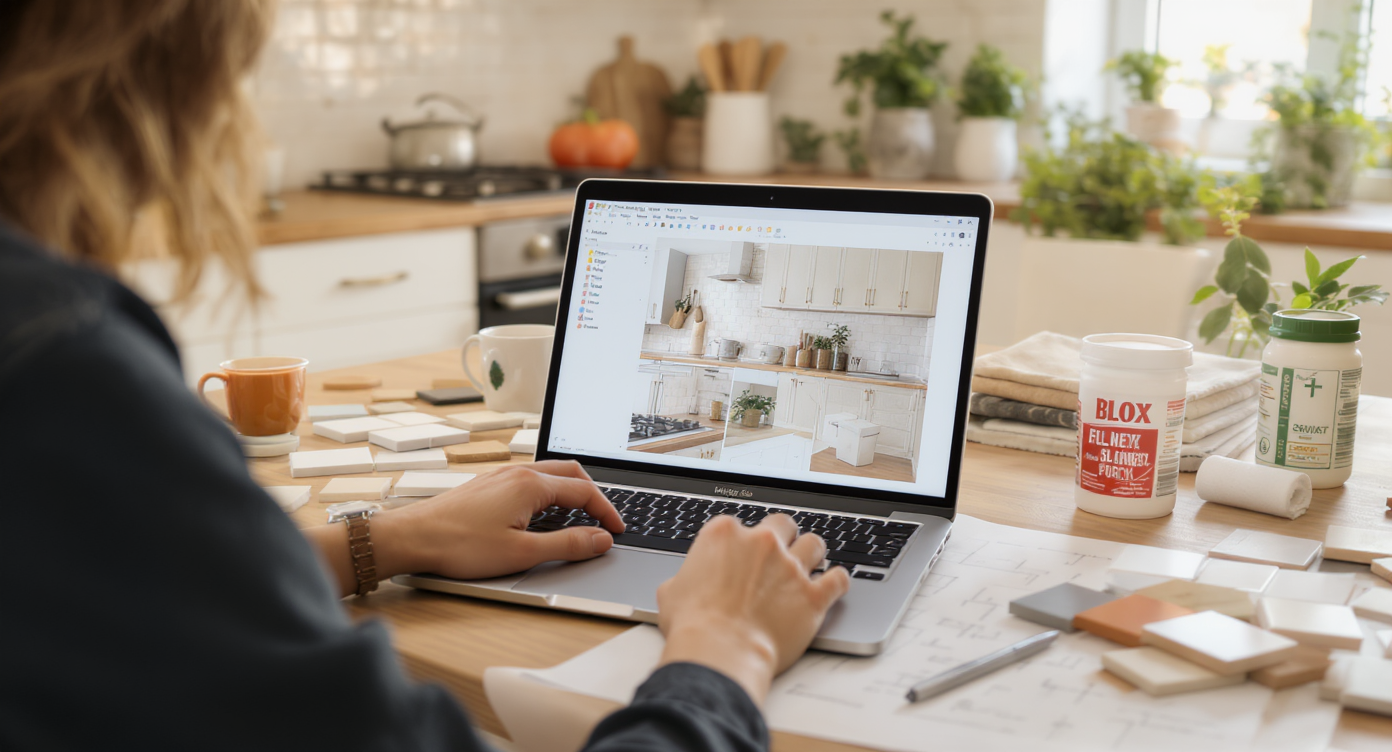
Preview backsplash layouts and materials using AI to avoid costly mistakes and achieve perfect tile installation.
Most first-time backsplash wins start the same way: draw a level line, dry-fit to avoid slivers, and set that bottom course perfectly; the rest follows. Use an AI room designer to preview tile scale, grout color, and edge trim in your actual photo so the plan is clear before you cut.
- Backsplash layout that avoids awkward slivers and tricky outlet cuts
- Materials, tools, and clean edge options (Schluter-style trim vs. bullnose)
- Mastic vs. thinset: which adhesive where
- Outlets, box extenders, and caulk vs. grout at changes of plane
- Lighting sanity: wafer-light spacing and under-cabinet LEDs for 8-foot ceilings
- How to use AI interior design from a photo to make decisions in minutes
Before you move a single sofa or pick up a paint roller, upload a photo to ReimagineHome.ai and test a few ideas safely.
If you want a broader view of visual planning, this overview of AI interior design tools and virtual room design explains how photo-to-room restyling works, free vs. paid options, and when to upgrade.
Why Kitchen Dilemmas Are Usually About Layout, Scale, and One Wrong Detail
Understanding tile scale and layout details can prevent common backsplash installation dilemmas.
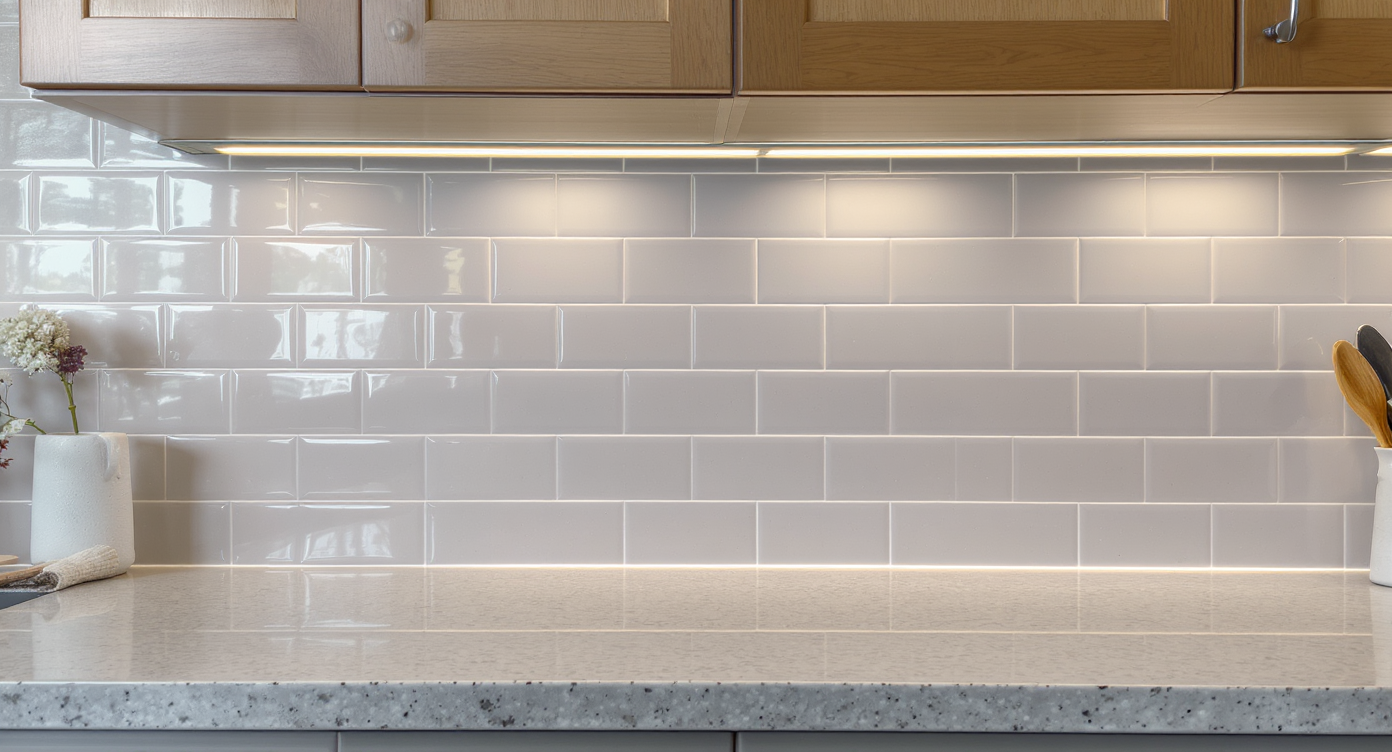
Most kitchen wall cabinets sit roughly 18 inches above the countertop, which means tile layout decisions are condensed into that tight, highly visible band. When a backsplash feels “off,” it’s usually because the first course wasn’t laser-level, the cuts were planned from one end instead of a centerline, or the grout/edge choices fight the countertop. Add in a couple of poorly placed outlets and you’ve engineered a daily eye twitch.
Think of this as a scale-and-circulation problem, not a total remodel. The wall plane needs to look calm, the pattern should resolve cleanly at ends and around obstacles, and changes of plane should be caulked, not grouted. If your kitchen is also dim (common in homes with no overhead fixtures), a backsplash alone won’t fix that; a small lighting plan — even just under-cabinet LEDs on a dimmer — changes how surfaces read.
Common constraints we see: older drywall with texture or adhesive residue, out-of-level countertops, and outlets that land right on grout lines. Each has a straightforward fix if you plan early. For a deeper layout primer you can skim before shopping, see this backsplash layout and finish guide for pattern choices, trim edges, and grout color tests.
Anecdote
That corner where the tile meets drywall with no trim — the spot you promise no one will notice — is exactly where your eye goes every morning. A $12 edge profile fixes what $600 of tile can’t.
Tile-and-Light Rules That Quietly Solve Most Kitchen Problems
Smart use of caulk joints and lighting creates durable, clean backsplash surfaces with subtle style.
Leave a 1/8–3/16 inch flexible caulk joint where tile meets countertop and at any inside corner; grout is for tile-to-tile only. Clear rules avert 90% of problems:
- First-course level: Snap a level line off the highest point of the countertop. Shim that bottom gap with 1/8 inch spacers; you’ll later caulk it, not grout it.
- Layout logic: Find a visual center (range, window, or full run), dry-lay a row with spacers, and work outward so cut pieces land symmetrically at ends. Avoid top-row “slivers”; if needed, slightly increase joint size or trim the bottom course.
- Adhesive: On painted drywall in a dry kitchen, Type-1 mastic is fine for most ceramic subways and small mosaics; use a modified thinset for stone, glass, or large-format tile.
- Notch sizes: 3x6 subway often likes a 1/4x1/4 square or 3/16 V-notch; bigger tile needs a bigger notch. Set a few, then pull one to confirm full coverage.
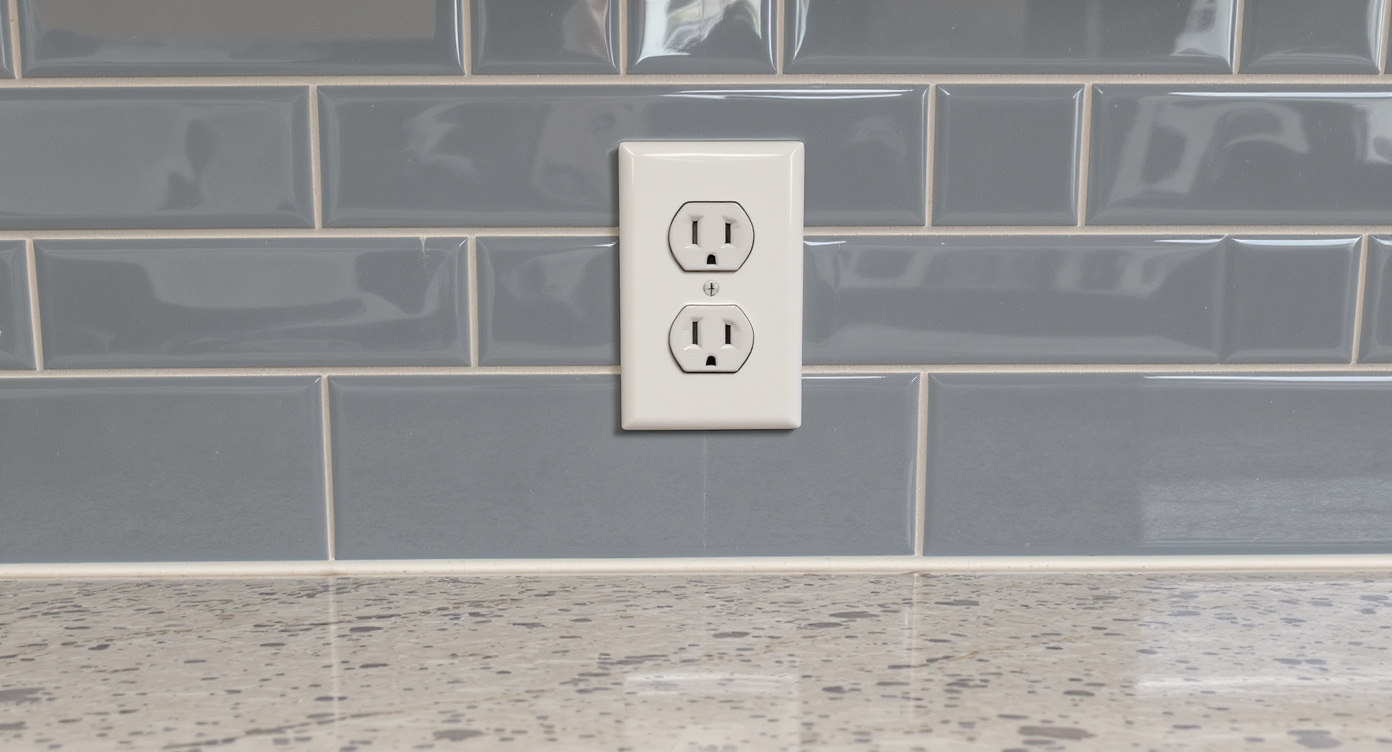
- Outlets: Add UL-listed box extenders to match tile thickness and keep devices flush. Try to center outlets in full or half tiles where possible; sometimes a slight layout shift saves multiple fussy U-cuts.
- Edges: Finish exposed ends with a Schluter-style metal profile or coordinating bullnose. Aim to stop on a full tile, not mid-rectangle.
Lighting tune-up, 8-foot ceilings: wafer lights typically feel balanced when spaced about 4–5 feet apart and 2–3 feet from walls, all on a dimmer. If your living or eat-in area lacks a ceiling box, under-cabinet LEDs plus a floor or table lamp layered with task lighting beats a grid of over-bright cans; light the surfaces, not just the air.
Want a quick visual on spacing and brightness? Use a room design AI to generate a couple of ceiling plans and compare them to an under-cabinet-only scenario; it’s the fastest way to choose a calm, non-glary solution.
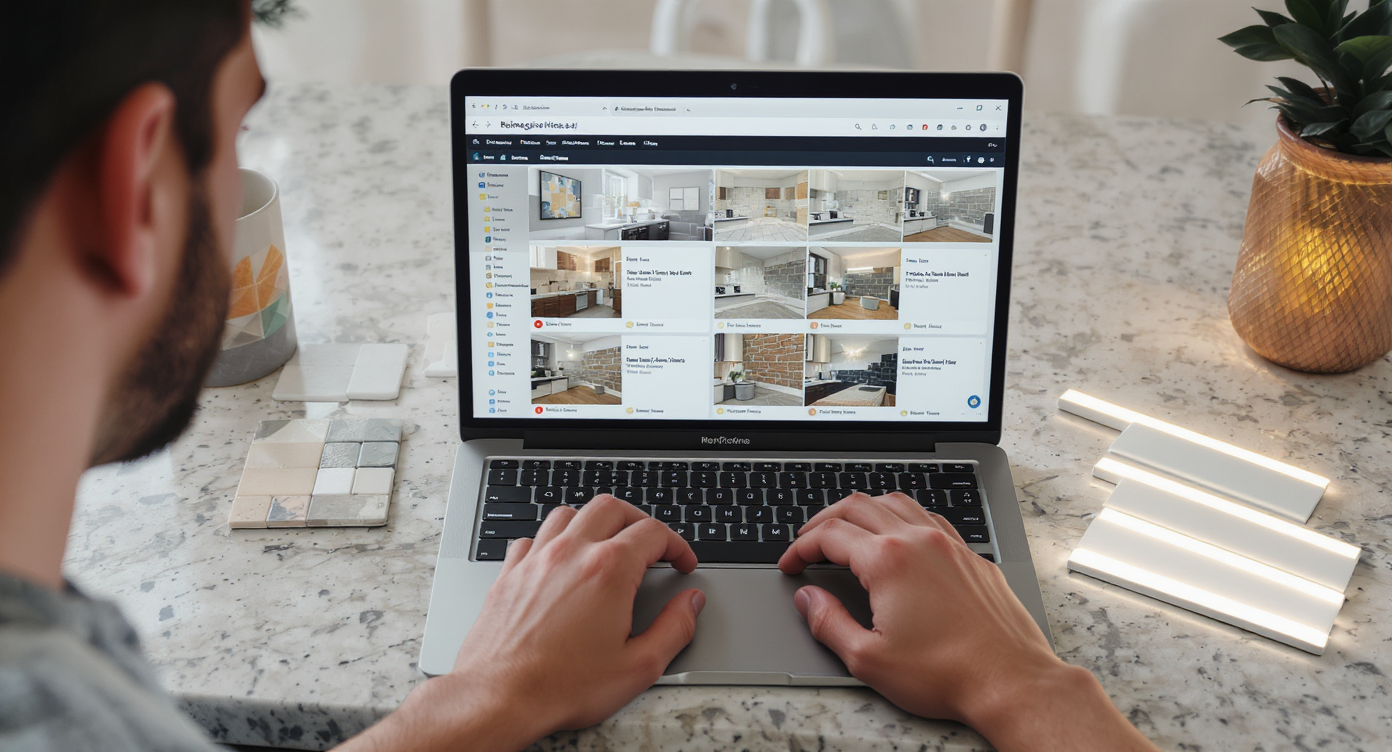
How ReimagineHome.ai Helps You Test Layouts, Styles, and DIY Ideas
Use AI tools to visualize backsplash styles and lighting before starting your DIY project for confident choices.
AI tools can show multiple tile, grout, and lighting options in minutes — before you move a single outlet or cut a single tile. Here’s how to use ReimagineHome.ai as your virtual staging and planning lab:
- AI interior design from one photo: Upload a straight-on shot of your kitchen wall. Swap tile sizes (3x6, 2x8, 4x12), patterns (straight, running bond, herringbone), and grout colors to see how the 18-inch height reads with each choice.
- Edge and termination tests: Toggle between metal edge profiles and bullnose; preview where to stop the tile at the cabinet run or at a window return.
- Paint and finish coordination: Adjust wall color, cabinet tone, and hardware finishes to find a palette with a 70/30 balance (dominant vs. accent). It’s a quick way to audition Scandi, Japandi, or contemporary palettes without repainting.
- Virtual room design for lighting: Drop in under-cabinet LED strips, test dimmable wafer-light grids for 8-foot ceilings, and compare color temperature (2700K–3000K is usually friendlier in kitchens).
If you’re new to room design AI, skim this deep-dive on AI room makeovers for tips on getting accurate results from a single photo, plus free vs. paid workflow ideas.
Step-by-Step: Your DIY Backsplash (Plus a Smarter Lighting Tune-Up)
Follow a precise, step-by-step approach for a flawless DIY backsplash and smarter kitchen lighting upgrade.
Most designers allocate 4–6 hours for setting tile on a typical backsplash and a second session for grout; plan a calm weekend. Here’s a straightforward path:
- Measure and plan (30–45 minutes): Confirm the backsplash height (often 18 inches). Mark a centerline at your focal point (range or window) and snap a level line for the first course. In AI, preview tile scale and grout so you know the look.
- Prep the wall (45–90 minutes): Remove sticky tiles, sand residual adhesive, skim any divots with joint compound, and prime glossy paint with a bonding primer. Kill power, pull cover plates, and install box extenders sized to tile thickness.
- Dry-fit a row (20 minutes): Lay tiles with spacers on the counter to test where cuts will land at ends and under cabinets. Adjust now to avoid top-row slivers.
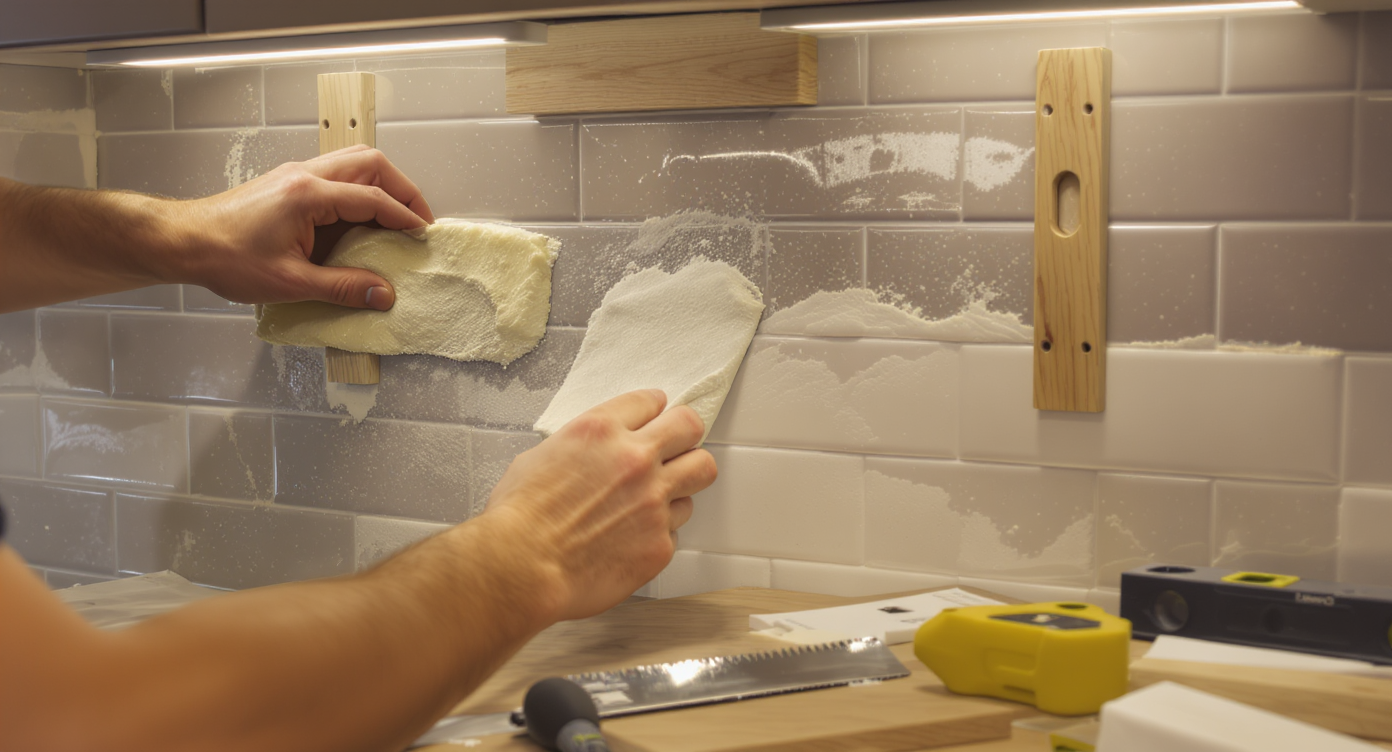
- Set the first course (60 minutes): Trowel mastic (or thinset, as needed) with the correct notch. Set tiles on 1/8 inch spacers above the countertop. Check level every few pieces; wipe squeeze-out immediately.
- Work upward (60–120 minutes): Stagger joints if doing a running bond. Pre-cut outlet pieces with a wet saw or score-and-snap plus an angle grinder for L-cuts. Keep joints consistent.
- Finish edges (15 minutes): Bed a Schluter-style profile in adhesive or set bullnose tiles. Tape along the edge first for a crisp line, then remove the tape before the adhesive skins over.
- Cure and grout (60 minutes next day): After adhesive cures, grout with unsanded for ≤1/8 inch joints or sanded for wider. Wipe diagonally with a barely damp sponge; change water often.
- Seal and caulk (30 minutes): Seal stone if applicable. Caulk the counter-to-tile joint and inside corners with color-matched silicone. Reinstall devices and plates.
- Lighting touch (60–120 minutes, optional): Add dimmable under-cabinet LEDs. If you’re set on recessed lighting in an 8-foot ceiling, plan a 4–5 foot grid and dimmers; use AI to verify spacing before you cut.
For a condensed checklist you can keep open while you work, this DIY backsplash prep-and-install guide covers tools, trowel sizes, and safety.
Visualization Scenario
Upload a straight-on photo of your range wall to ReimagineHome.ai, then toggle between 3x6 running bond with warm gray grout vs. 2x8 stacked with white grout; switch the edge to a brushed brass profile and add under-cabinet LEDs to compare brightness and shadowing.
FAQ
How do I start a DIY kitchen backsplash as a beginner?
Level the first course, dry-fit a row to avoid slivers, choose the right adhesive (mastic for most ceramic on drywall; thinset for stone/large tile), and add box extenders at outlets. Use an AI room planner to preview tile size, grout, and edges in your actual photo.
What adhesive should I use for a backsplash on painted drywall?
Type-1 mastic works for most ceramic and porcelain subways in dry zones; use a modified thinset for glass, natural stone, or large-format tile. Always prime glossy paint for better bond.
How can I see tile patterns and grout colors before I buy?
Upload a room photo to ReimagineHome.ai to test patterns (running bond, herringbone), grout colors, and terminations. It’s AI interior design from a photo, ideal for small DIY decisions.
Are recessed wafer lights a good alternative to pot lights in an 8-foot ceiling?
Yes — spaced about 4–5 feet apart and 2–3 feet from walls, on dimmers, they’re a low-profile fix. Pair them with under-cabinet LEDs for task light and a cozier overall effect.
Which AI interior design tool is best for small DIY projects?
ReimagineHome.ai is designed for photo-to-room restyles, tile and paint tests, and virtual room design. For features and pricing, see this breakdown of AI interior design tools.
Visualize Your Room’s Next Chapter
Rooms read calmer when the plan is clear: the first course is level, edges are intentional, and light lands where you need it. That’s the difference between “I guess this works” and “Oh — this finally feels like my kitchen.” When you can see tile scale, grout lines, and lighting in your own photo, decisions get easier and your cuts get smarter.
When you can see the possibilities, it’s easier to move with confidence. Start by uploading one honest photo to ReimagineHome.ai and let your next version of the room come into focus.