
TL;DR
Fast way to make a new-build kitchen look high-end: add cabinet hardware, tile the backsplash to the ceiling (remove the 4-inch counter upstand first), warm the palette with wood stools and under-cabinet lighting, and choose one metal as your lead. You can mix metals if undertones match and functions stay consistent. Use ReimagineHome.ai to visualize gold vs nickel hardware, pendant lighting, and full-height backsplash ideas from a single photo before you buy. It’s a budget-friendly, DIY-forward path that reduces decision fatigue and returns.
Why This Kitchen Feels ‘Off’ (and Why You’re Not Imagining It)
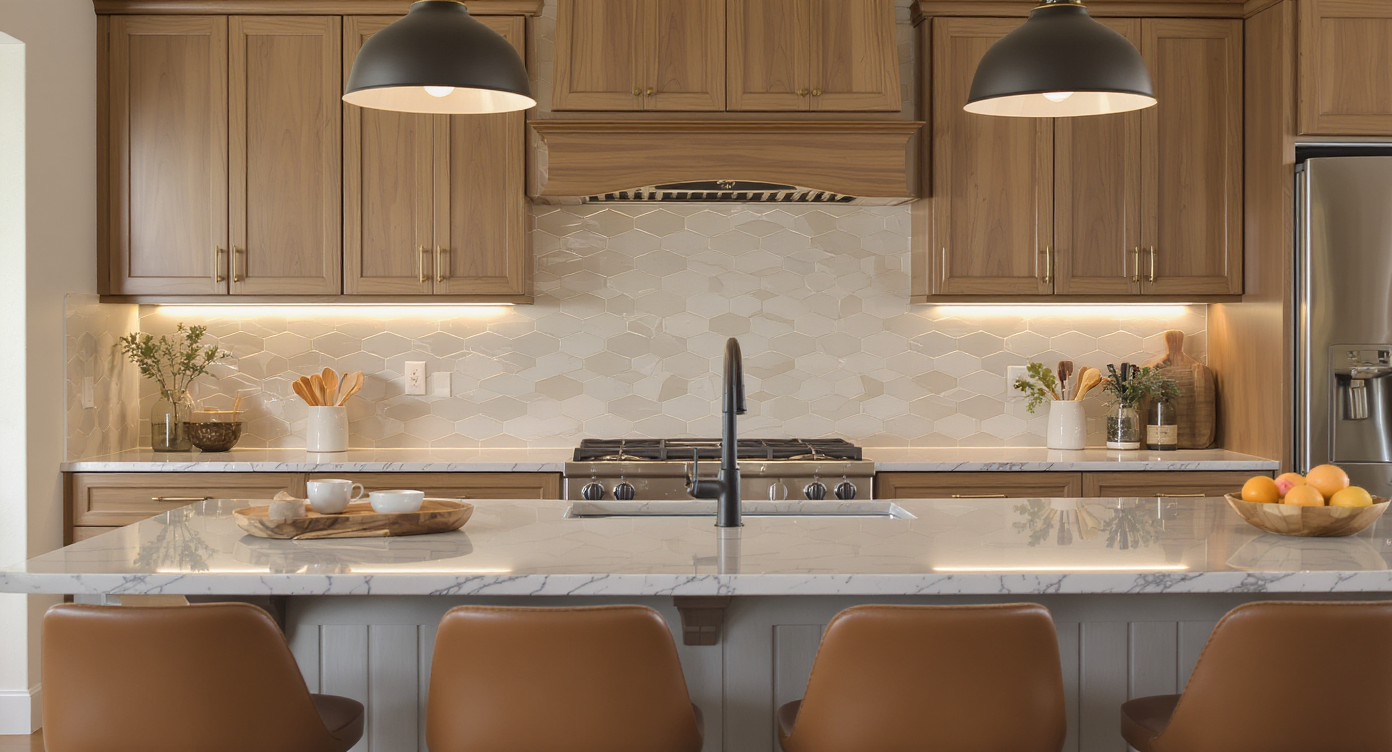
Layered materials and lighting transform cold kitchens with simple finish and hardware upgrades.
Direct answer: to make a new-build kitchen feel designed, prioritize a full-height backsplash (and remove the 4-inch counter upstand), add hardware, pendants, and under-cabinet lighting, and layer warm wood and leather. Mixed metals work if undertones match and you group by function. Use an AI room tool to preview these upgrades so you can choose confidently and avoid costly do-overs.
- At a glance: full-height backsplash strategy and why the 4-inch upstand should go
- Hardware and mixed-metals rules (gold vs nickel vs black) that look intentional
- Pendant placement, under-cabinet lighting, and paint tweaks that add warmth fast
- Stools, runners, and wood accents that break up a big blocky island
- How to use ReimagineHome.ai for photo-to-restyle, finishes, and layout tweaks
- Step-by-step plan with DIY-friendly measurements and tools
- Common mistakes to avoid (like tiling above the upstand or overdoing a trendy finish)
Before you move a single stool or order a faucet, upload a photo to ReimagineHome.ai and test a few ideas safely.
Want more? See how AI helps with small-space layouts and read more on AI-powered furniture planning. Curious about tools? Explore virtual room design platforms.
Why Interior Design Dilemmas Are Usually About Layout, Scale, and One Wrong Piece
Right layout, scale, and one wrong piece can make or break new-build kitchen design.
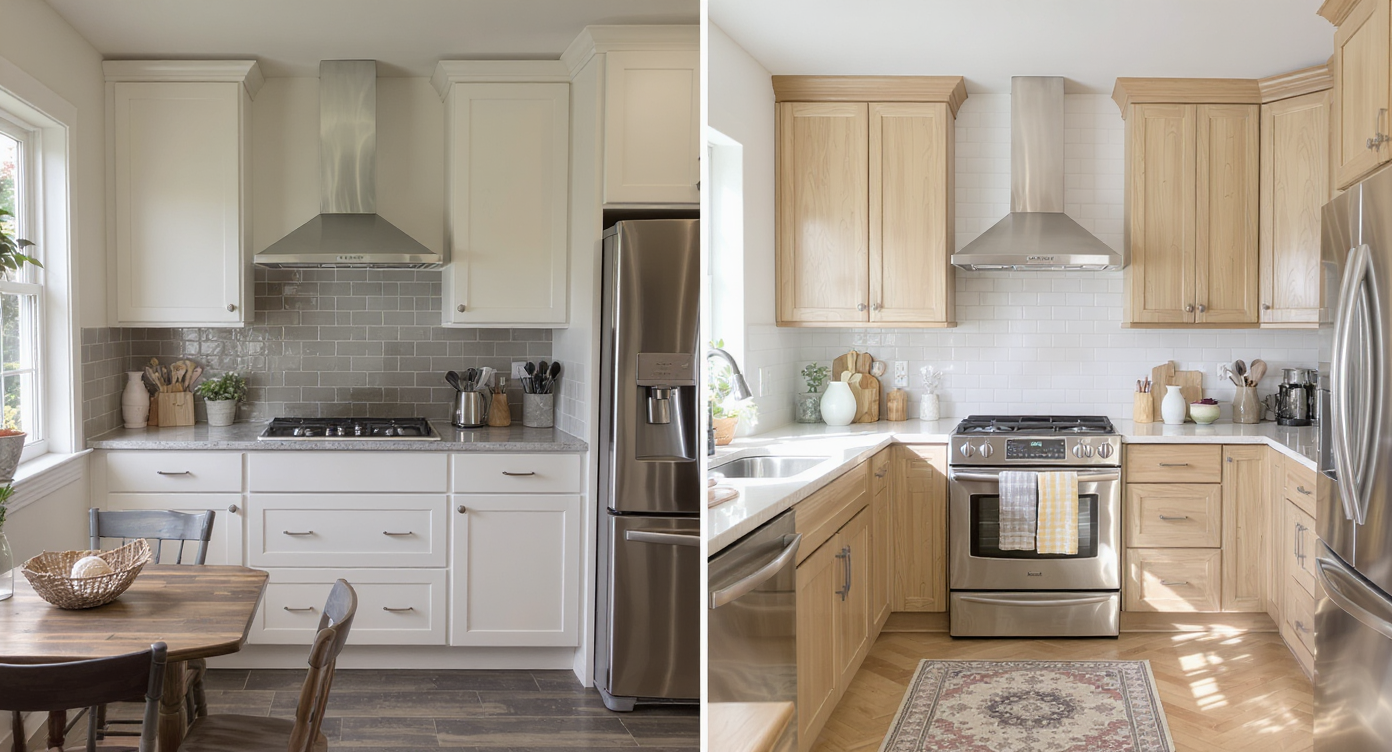
Most designers recommend 18 inches between countertop and upper-cabinet bottoms; if you add tile, it should meet the counter cleanly without a 4-inch quartz upstand in the way. That single detail is why so many brand-new kitchens read as “unfinished.”
In new builds, the bones are often fine; what’s missing are visual anchors and warmth. The usual culprits: no backsplash, no cabinet hardware, cool-on-cool palettes (navy, gray, stainless) without wood or leather, and ceiling lighting without pendants or under-cabinet task light. Add one misfit element—like tiling above the existing upstand—and the room looks pieced together instead of intentional.
Think of your kitchen as a tailored outfit. The cabinets and counters are the suit; hardware, lighting, and backsplash are the watch, belt, and shoes. Without them, the outfit feels generic no matter how expensive the fabric.
Anecdote
You know that moment when the fridge still isn’t installed, the walls are cool gray, and the island reads like a big navy monolith? I watched a client add honey-bronze pulls, remove the upstand, tile to the ceiling behind the hood, and swap in caramel leather stools. The hood they thought they needed to replace suddenly felt intentional—and their return cart stayed empty.
Furniture-and-Finish Rules That Quietly Fix Most Builder-Grade Kitchens

Strategic furniture sizes and mixed-metal finishes quietly upgrade builder-basic kitchens.
Counters typically need 10–12 inches of overhang for comfortable seating; choose 24–26-inch seat height stools for a 36-inch counter, leaving about 6 inches between stools for hips and elbows.
- Backsplash basics: Remove the 4-inch counter upstand if you plan to tile. Full-height tile to the bottom of the uppers—and all the way to the ceiling behind a range hood—instantly looks custom.
- Hardware rules: Group by function and undertone. All plumbing (faucet, pot filler) one finish; all pulls/knobs one finish; all decorative lighting one finish. Warm brass pairs best with warm stainless/nickel; cool chrome plays best with black or stainless.
- Mixed metals that work: 70/30 is a safe mix. Let one metal lead (say, brushed brass on pulls and pendants), and use a supporting finish (nickel/stainless) for appliances and the hood. Repeat each finish at least three times for cohesion.
- Lighting that flatters: Hang pendants 30–36 inches above the island surface and 24–30 inches apart. Add under-cabinet LED strips at 2700–3000K; aim for roughly 200–400 lumens per linear foot for task light that also warms the palette.
- Paint and texture: Cool walls make navy + white feel sterile. Consider a soft greige or clay tone on adjacent walls, a patterned runner, and leather or cane stools to break up a long, flat island face.
Unsure how these numbers and finishes play in your space? Generate side-by-side options in ReimagineHome.ai using your exact photo.
How ReimagineHome.ai Helps You Test Layouts, Finishes, and DIY Ideas
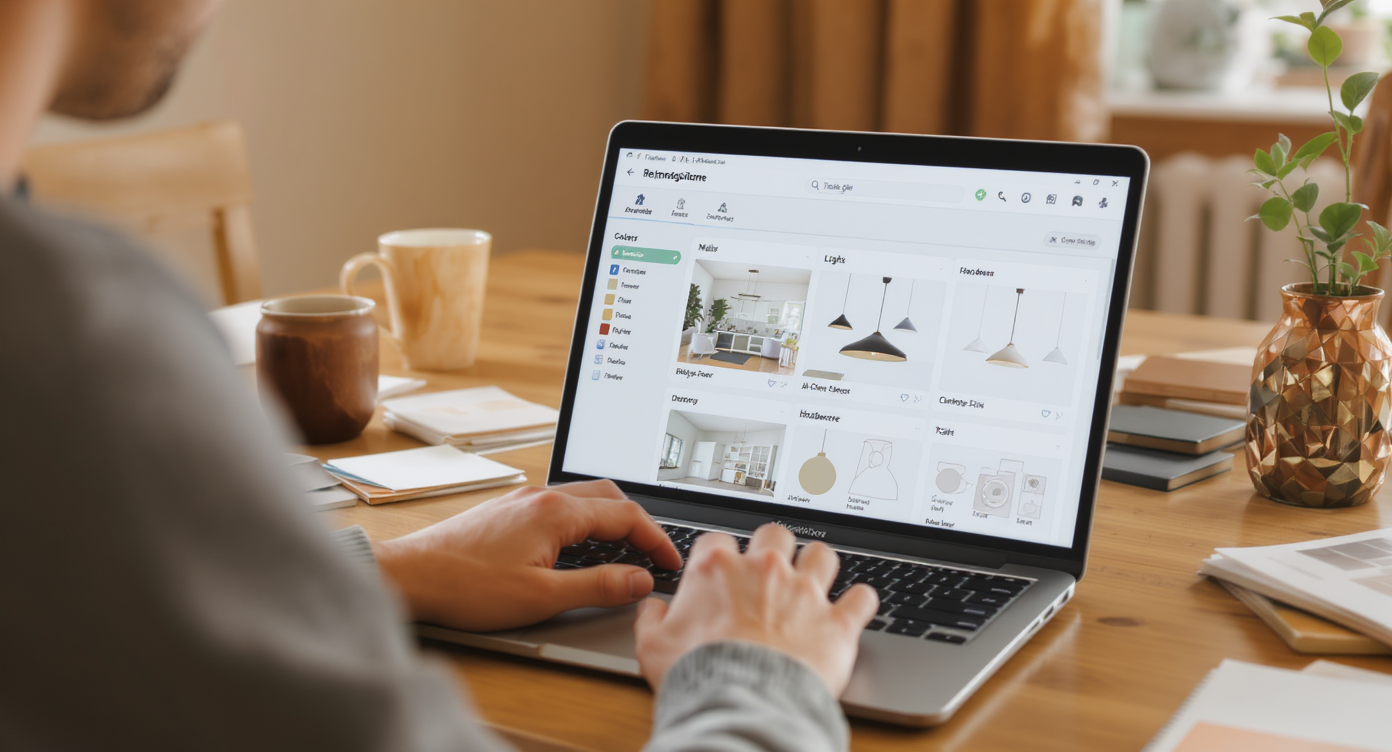
ReimagineHome.ai enables testing kitchen finishes and layouts virtually before committing.
AI tools can show multiple backsplash, hardware, and lighting options in minutes—before you drill a single hole or order 40 square feet of tile.
With ReimagineHome.ai you can:
- Restyle from one photo: Upload your kitchen image and try gold hardware vs black vs nickel, plus pendant types and heights—no measurements required.
- Visualize full-height backsplashes: Test zellige-style handmade tiles, elongated subway in herringbone, soft-vein marble looks, or color-drenched navy tile behind the hood.
- Preview wood and texture: See if fluted/tambour panels on the island, beadboard, or a simple shaker end-panel detail adds the right dimension.
- Experiment with paint and undertones: Swap cool gray walls for warm greige; compare how brass vs chrome plays against each wall color.
- Build inspiration mood boards: Combine finish samples, runners, and bar stools into one view, then export as a checklist for shopping.
Whether you’re comparing free vs paid AI interior design tools, hunting alternatives to popular room mockup apps, or ranking virtual room design platforms for beginners, the advantage is the same: low-risk, high-clarity decisions you can implement on a realistic budget.
Step-by-Step: Warm Up a New-Build Kitchen with AI and Simple DIY Changes
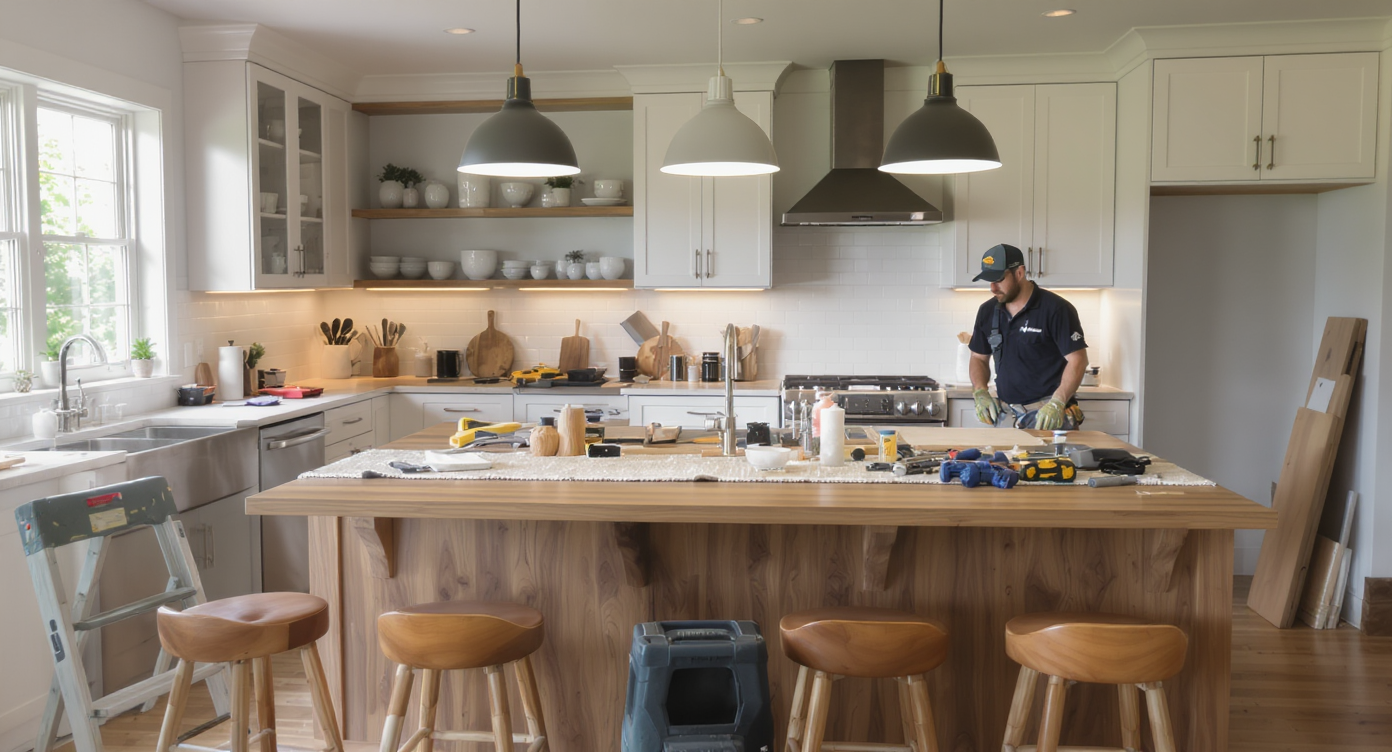
Simple DIY changes and AI guidance give new-build kitchens cozy, polished warmth.
Most islands look best with two or three pendants, centered and spaced evenly, and a runner placed 3–4 inches off the base of the cabinets to avoid toe-kick interference.
- Step 1 — Photograph and upload: Take a straight-on photo of your kitchen and upload to ReimagineHome.ai. Generate versions with: a) brass pulls + warm pendants, b) nickel pulls + black pendants, c) black pulls + brass pendants.
- Step 2 — Backsplash test: In AI, try full-height tile to the uppers, then to the ceiling behind the hood. If you currently have a 4-inch upstand, model the look without it. Note how meeting the counter creates a cleaner, elevated edge.
- Step 3 — Light the work zone: Add under-cabinet LED strips (2700–3000K). If hardwiring now isn’t feasible, start with plug-in or battery strips; plan to wire later.
- Step 4 — Warm the palette: Preview caramel leather or woven wood stools (24–26-inch seat height). Add a washable runner with warm clay/terracotta threads.
- Step 5 — Hardware in real life: Order 2–3 sample pulls in your top finish to check undertones against cabinets, counter, and floor. Use a drilling template and standard center-to-center sizes (96 mm/3-3⁄4 in or 128 mm/5 in) for easy future swaps.
- Step 6 — Decide on the island face: If your island reads flat, test fluted/tambour or shaker-style paneling in AI. In real life, paint-grade beadboard is a simple DIY; caulk, prime, and paint for a built-in look.
- Step 7 — Accessorize with intention: Lean a walnut cutting board, place a brass or black utensil crock, and add an herb pot. Keep counters 75–80% clear for a calm, functional vibe.
- Step 8 — Pause on big-ticket changes: A custom hood cover can wait. Often, once tile, lighting, and hardware land, the stainless hood recedes nicely.
Visualization Scenario
Upload a straight-on photo to ReimagineHome.ai and generate three versions: 1) brushed brass pulls + white zellige to the ceiling, 2) satin nickel pulls + elongated subway in herringbone, 3) matte black pulls + navy glazed tile behind the hood. Compare pendants at 30 vs 36 inches above the island and preview leather vs cane stools.
FAQ
How do I fix a new-build kitchen that looks cold without replacing cabinets?
Remove the 4-inch counter upstand and install a full-height backsplash, add hardware, pendants, and under-cabinet lighting, then warm it up with wood or leather stools and a runner. Visualize options in ReimagineHome.ai before you commit.
Can I mix metals in a kitchen with stainless appliances?
Yes. Keep functions consistent (plumbing one finish, hardware one finish, lighting one finish) and match undertones. A 70/30 mix (e.g., brass hardware and pendants with stainless appliances) looks intentional.
Should I tile above the existing 4-inch stone upstand?
No. It reads like an afterthought. Remove the upstand so tile meets the counter cleanly for a custom look.
What’s the right height and spacing for island pendants?
Typically 30–36 inches above the counter and 24–30 inches apart, with 6 inches of clearance from the island edge.
Which AI interior design tool can redesign a kitchen from one photo?
ReimagineHome.ai can restyle a kitchen from a single photo, showing backsplash, hardware, lighting, and color changes quickly so you can make budget-smart choices.
Visualize Your Room’s Next Chapter
Every kitchen has a next chapter. Yours is a few finishes and smarter lighting away from warm and welcoming. When you can see the options side by side, it’s easier to move with confidence, invest where it matters, and skip what you don’t need. Start by uploading one honest photo to ReimagineHome.ai and let the best version of your kitchen come into focus.