.svg)

.svg)

TL;DR
Pampas grass regrows from the living crown, not from the old fibrous roots, so removing or killing the crown is the key to permanent control. If you want to know how to remove pampas grass without chemicals, use sheet mulching, solarization, or repeated cutbacks to starve it. For faster results, the cut-and-paint herbicide method targets the crown with minimal soil impact. Replant densely with tough, non-invasive grasses and shrubs to keep the space filled and weed-resistant.
The Root Of The Problem
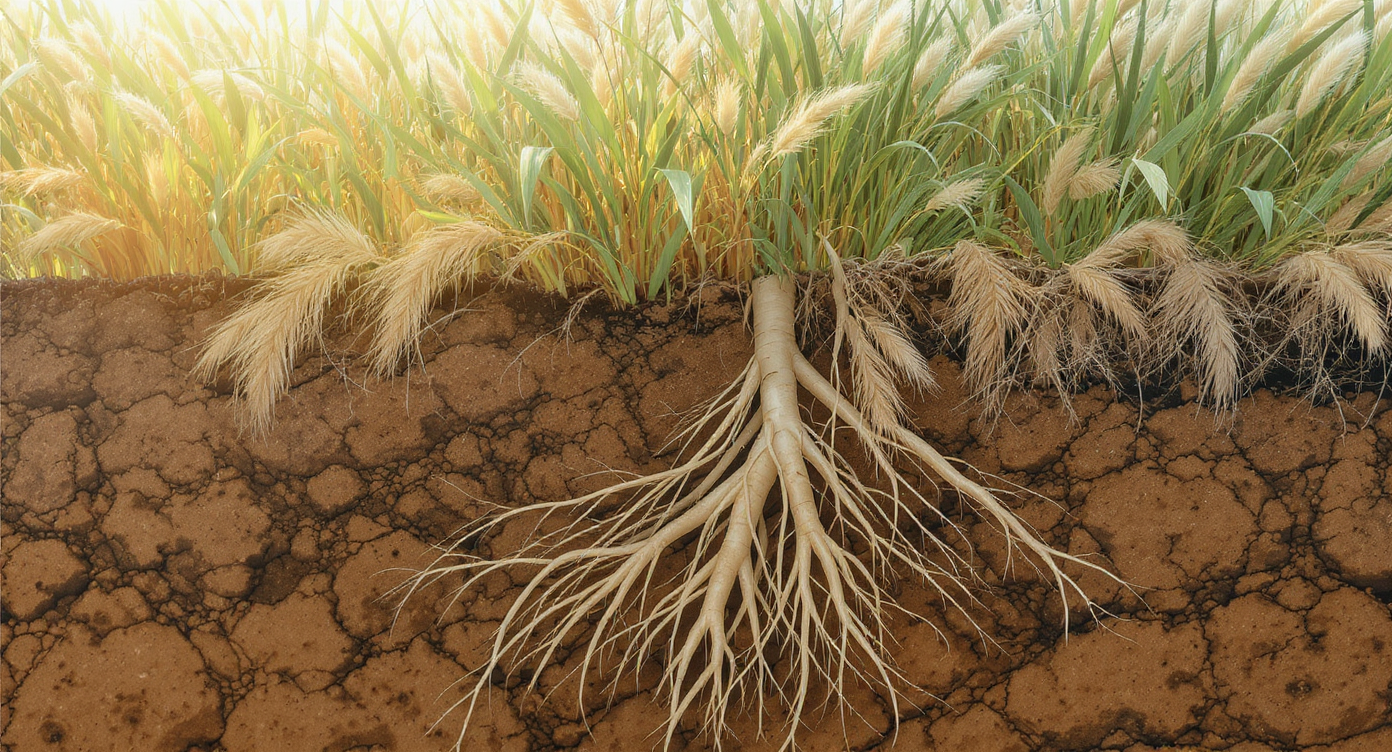
Understanding pampas grass root depth is key to successful removal and future garden planning.
Most pampas grass clumps are 18 to 36 inches across with roots that can reach 2 to 4 feet deep, which is why they seem endless under pavers and fences. If you are wrestling with how to get rid of pampas grass roots without ruining future planting, the trick is understanding where regrowth actually starts.
Pampas grass, a clumping bunchgrass, regrows from its crown, not from detached, decaying roots that snake outward. That distinction changes everything. Once the crown is removed or killed, remaining roots break down over 6 to 18 months, improving soil structure rather than threatening a comeback.
I’ve stood in windswept coastal lots where crews fought towering tufts with machetes, and I’ve watched homeowners in dry inland valleys win slowly with cardboard and patience. Here’s how to beat it, and plant something better, in real yards and real timelines.
Theme Overview: From Digging To Done
Most successful removals combine a crown-focused tactic with light exclusion or heat to stop resprouts and seeds. Think of it like this: dethrone the plant, then deny light and space until you’re ready to replant.
From straight-up digging to solarization to the precise cut-and-paint herbicide method, the goal is the same: neutralize the crown, let roots decompose in place, and refill the bed with resilient, non-invasive choices. Keywords to guide your search and planning include pampas grass removal, invasive plants, native landscaping, and backyard garden ideas.
Anecdote
In coastal California, a crew I shadowed cleared three 8-foot clumps in a day by slicing the crowns into pie pieces, then solarizing over summer to catch seedlings. A homeowner in Phoenix beat a single clump without chemicals by cutting every three weeks for one season and sheet mulching with fresh arborist chips.
9 Practical Ways To Remove Pampas Grass And Keep It Gone
01. Start With The Crown, Not The Roots
Regrowth happens from the living crown at soil level, so removing or killing the crown prevents the plant from returning.
What it is: A crown-first strategy that targets the dense basal clump where leaves meet roots.
How it works: Use a mattock or digging bar to slice the crown into manageable wedges, then pry each wedge out, roots attached. In clay or rocky soils, watering the area the day before helps, as does cutting foliage to 12 inches for visibility and leverage. Expect the crown to be 12 to 24 inches thick and stubborn. Detached roots under bricks or pavers can be left; they will not generate new plants without crown tissue.
- Score the crown into pie slices, then lever each slice out.
- Wear eye protection and long sleeves, the leaves are razor-sharp.
- Backfill holes with compost and native soil to speed decomposition.
Alt text: Close view of a pampas grass crown being segmented with a mattock for removal.
02. The Cut‑And‑Paint Option For Speed
Applying a concentrated herbicide to freshly cut crowns targets the plant with minimal soil contact and fastest kill.
What it is: A targeted, low-drift method favored by many land managers for tough perennials.
How it works: Cut the clump to 2 to 4 inches, then immediately wipe the cut surfaces with a 20–50% glyphosate solution using a foam brush or sponge. Because it is applied to living tissue, little reaches the soil, and labels generally allow replanting after the site is dry and foliage browns, often within 1 to 2 weeks. Follow local regulations and product directions precisely.
- Choose a calm, dry day and protect nearby plants with cardboard shields.
- Dye the solution blue to see coverage and prevent over-application.
- Spot-treat any green resprouts promptly.
Caption: Cut-and-paint is about precision, not broadcast spraying.
03. Sheet Mulch To Smother Without Chemicals
Two to three layers of overlapping cardboard topped with 4 to 6 inches of wood chips exclude light and suppress resprouts and seedlings over 6 to 12 months.
What it is: A chemical-free mulch sandwich that starves the crown and seeds of light.
How it works: After cutting the clump to the ground and removing as much crown as possible, lay down weed-free cardboard in 24 to 36 inch sheets, overlapping by 6 inches. Top with coarse chips or shredded bark to maintain coverage and moisture. In hot, dry climates, moisten the cardboard first to help it conform and decompose evenly.
- Edge the perimeter with stones or pins so wind doesn’t lift layers.
- Extend coverage 2 feet beyond the old clump to catch stray seedlings.
- Plan to re-top with 2 inches of mulch after 6 months if gaps appear.
04. Solarization For Hot‑Climate Wins
Clear plastic held taut for 6 to 8 peak-summer weeks can raise topsoil temperatures to 110–125°F, killing many crowns and seeds.
What it is: Sun-powered soil heating that cooks the problem near the surface.
How it works: After cutting low and removing debris, irrigate the area to field capacity, cover with 1 to 2 mil clear plastic, bury edges, and pull tight. The moisture conducts heat downward, boosting kill rates. This shines in USDA Zones 8–10 with long, hot summers; in cooler climates, extend to 8–10 weeks.
- Use a soil thermometer; aim for 110°F at 2 inches depth for several hours daily.
- Repair punctures immediately to prevent heat loss.
- Follow with sheet mulch if any green returns.
05. Exhaust Resprouts On A Schedule
Cutting or string‑trimming resprouts every 3 to 4 weeks over a full growing season depletes stored energy until the crown dies.
What it is: A persistence plan that trades chemistry for calendar discipline.
How it works: Plants need leaves to photosynthesize; each quick cut denies them that power. Keep blades at or just below soil level, bag clippings to avoid scattering seed, and don’t skip cycles. In my notes from a Central Valley yard, this took about one season to silence a neglected clump without chemicals.
- Set recurring reminders during spring and summer.
- Sharpen blades; clean sap off tools after each session.
- Combine with mulch to reduce the number of resprouts.
06. Install A Discreet Root Barrier At Boundaries
A 12 to 18 inch deep HDPE or metal barrier can intercept roots creeping under fences or pavers from off‑site clumps.
What it is: A below‑grade shield that blocks encroachment from a neighbor’s or common‑area plant.
How it works: Trench along the fence line, set the barrier with the smooth face toward the threat, and overlap seams by at least 12 inches. For hardscape resets, add geotextile and compacted base, then sweep polymeric sand into joints to deter seedlings between pavers.
- Angle the top lip 1 inch above grade so you can inspect it seasonally.
- Seal seams with exterior tape to prevent root sneaks.
- Pair with vigilant removal of any fence-line shoots.
07. Let Old Roots Rot, Then Feed The Soil
Dead pampas roots typically decompose in 6 to 18 months, leaving channels that improve drainage and soil tilth.
What it is: A soil-health mindset that treats old roots as future compost in place.
How it works: After crown removal, resist the urge to chase every root under brickwork. Instead, blend 2 to 3 inches of compost into backfill, water deeply to kickstart microbes, and top with mulch. I’ve seen this create richer, looser soil by the next spring, perfect for new plantings.
- Add a shovel of finished compost per square foot when backfilling.
- Mulch 3 inches deep, keeping it 2 inches off stems.
- Water new plantings with 1 inch per week until established.
08. Replant Densely To Keep Weeds Out
Filling the bed at 12 to 18 inch spacing shades soil within one season, reducing pampas seedlings and other weeds by up to 70 percent.
What it is: A living mulch approach using tough, non-invasive species.
How it works: Choose clumping grasses and shrubs that fit your USDA zone and sun: deer grass (Muhlenbergia rigens, Zones 6–10), switchgrass (Panicum virgatum, Zones 4–9), little bluestem (Schizachyrium scoparium, Zones 3–9), lavender, and rosemary in full sun. Designers often mix heights for a perennial border with year-round structure.
- Plant in odd-numbered groups for visual rhythm.
- Aim for 6+ hours of direct sun for most grasses to bloom well.
- Drip irrigation lines under mulch keep foliage dry and growth steady.
09. Time Your Work And Stay Safe
Late winter, before spring growth, is the safest window to cut back pampas and tackle crowns while visibility is high.
What it is: A seasonal and safety playbook.
How it works: Wear puncture-resistant gloves, long sleeves, eye protection, and consider a face shield; leaves have tiny serrations that slice skin. If burning debris is legal, dry foliage thoroughly and observe local rules; otherwise, bag and bin to avoid seed spread. A field note from Arizona: one homeowner used a pruning saw plus a digging bar, clearing a mature clump in two afternoons with fewer cuts once the foliage was pre-bundled with rope.
- Bundle leaves with twine before cutting to control flailing blades.
- Wet dust and dander if you’re sensitive; old clumps can be allergenic.
- Check local invasive-species guidance before replanting.
Transitional Reflection
The beauty of modern landscaping isn’t domination, it’s cooperation with process and time. Remove the crown, cover the ground, and let the soil do its quiet work while you plan a space that needs less from you each season.
In a year, the hole that felt endless will feel like a well-prepared bed, ready for plants that belong. The difference is night and day, and you can feel it in the way water soaks instead of runs and birds return to perch, not nest in a problem.
How To Visualize It Before You Plant
Before you plant a single shrub, map your space virtually to test layouts, sun paths, and edging lines that stop future headaches. Platforms like ReimagineHome let you preview garden designs, mulch coverage, and planting densities, turning rough sketches into living blueprints you can actually install.
Try dropping in root-barrier lines on the plan, spacing new grasses at 12 to 18 inches, and checking where a small tree might cast shade by year three. Seeing it first saves money, knees, and heartache later.
Visualization Scenario
Upload a photo of your side yard to ReimagineHome, set sun exposure to full sun, drop in a 15-inch root barrier along the fence line, then test layouts with deer grass and lavender at 16-inch spacing. Toggle mulch depth from 2 to 4 inches to see coverage and edge lines before buying materials.
FAQ: People Also Ask
How do you remove pampas grass without chemicals?
Cut the clump to the ground, pry out the crown, then smother with 2–3 layers of cardboard plus 4–6 inches of mulch. Repeat cuts every 3–4 weeks on any resprouts until growth stops.
Will pampas grass grow back from roots?
Pampas regrows from the living crown, not from dead, detached roots. If the crown is removed or killed, remaining roots decompose and do not sprout new plants.
How deep are pampas grass roots?
Most clumps have fibrous roots in the top 2 to 4 feet of soil, spreading laterally under pavers and fences. The crown itself is typically 12 to 24 inches thick.
How long after using herbicide can I replant?
With a cut-and-paint application, many labels allow replanting once the site is dry and foliage has browned, often within 1–2 weeks. Always follow the specific product directions.
Does cardboard kill pampas grass?
Cardboard doesn’t kill by itself, it excludes light; combined with mulch for 6–12 months, it starves crowns and prevents seeds from germinating. Extend coverage at least 2 feet beyond the clump.
What can I plant instead of pampas grass?
Choose non-invasive, clumping grasses and shrubs like deer grass, switchgrass, little bluestem, lavender, or rosemary. Plant densely at 12–18 inch spacing to create a low-maintenance, weed-resistant border.
Closing Reflection
Gardens have memories, and pampas grass writes in bold. But the fix is straightforward once you know the rule: stop the crown and the story ends. Whether you choose cut-and-paint for speed or cardboard and patience for a chemical-free path, the goal is the same, a resilient, eco-friendly yard that supports life without becoming unruly.
Walk the space at dusk after the hard work is done, when the soil smells alive and the mulch is still warm. Picture the border full and humming next season. If you need a nudge to see it, sketch it in ReimagineHome and let the future bed settle into place before you even lift a trowel.


.png)